 |
| The big white oak, as you can see it has begun to split by itself. |
Above is the oak log that has been residing by my garage for what I have determined is almost two years. I recruited my future son-in-law to split the white oak into a few manageable pieces for me. When I went out to make it accessible, and take the picture, I was happy to uncover previously split and rived pieces. You can see them between the log and the wall.
 |
| Previously split and rived pieces I uncovered. |
While I was unsure what the moisture content of the log would be I was certain that the previously split pieces would be too dry to work with. I used my froe and rived the largest piece in two and then took a moisture reading from the freshly opened face. As I had suspected the wood was fairly dry, the meter read 18%.
 |
| Shavehorse doing double duty as a saw bench. |
I cut the pieces for the arm/bow and spindles to their rough length and then using my
froe and
riving brake rived the pieces to rough size.
Click here to see a video of Curtis Buchanan demonstrating how a froe and riving brake are used.
 |
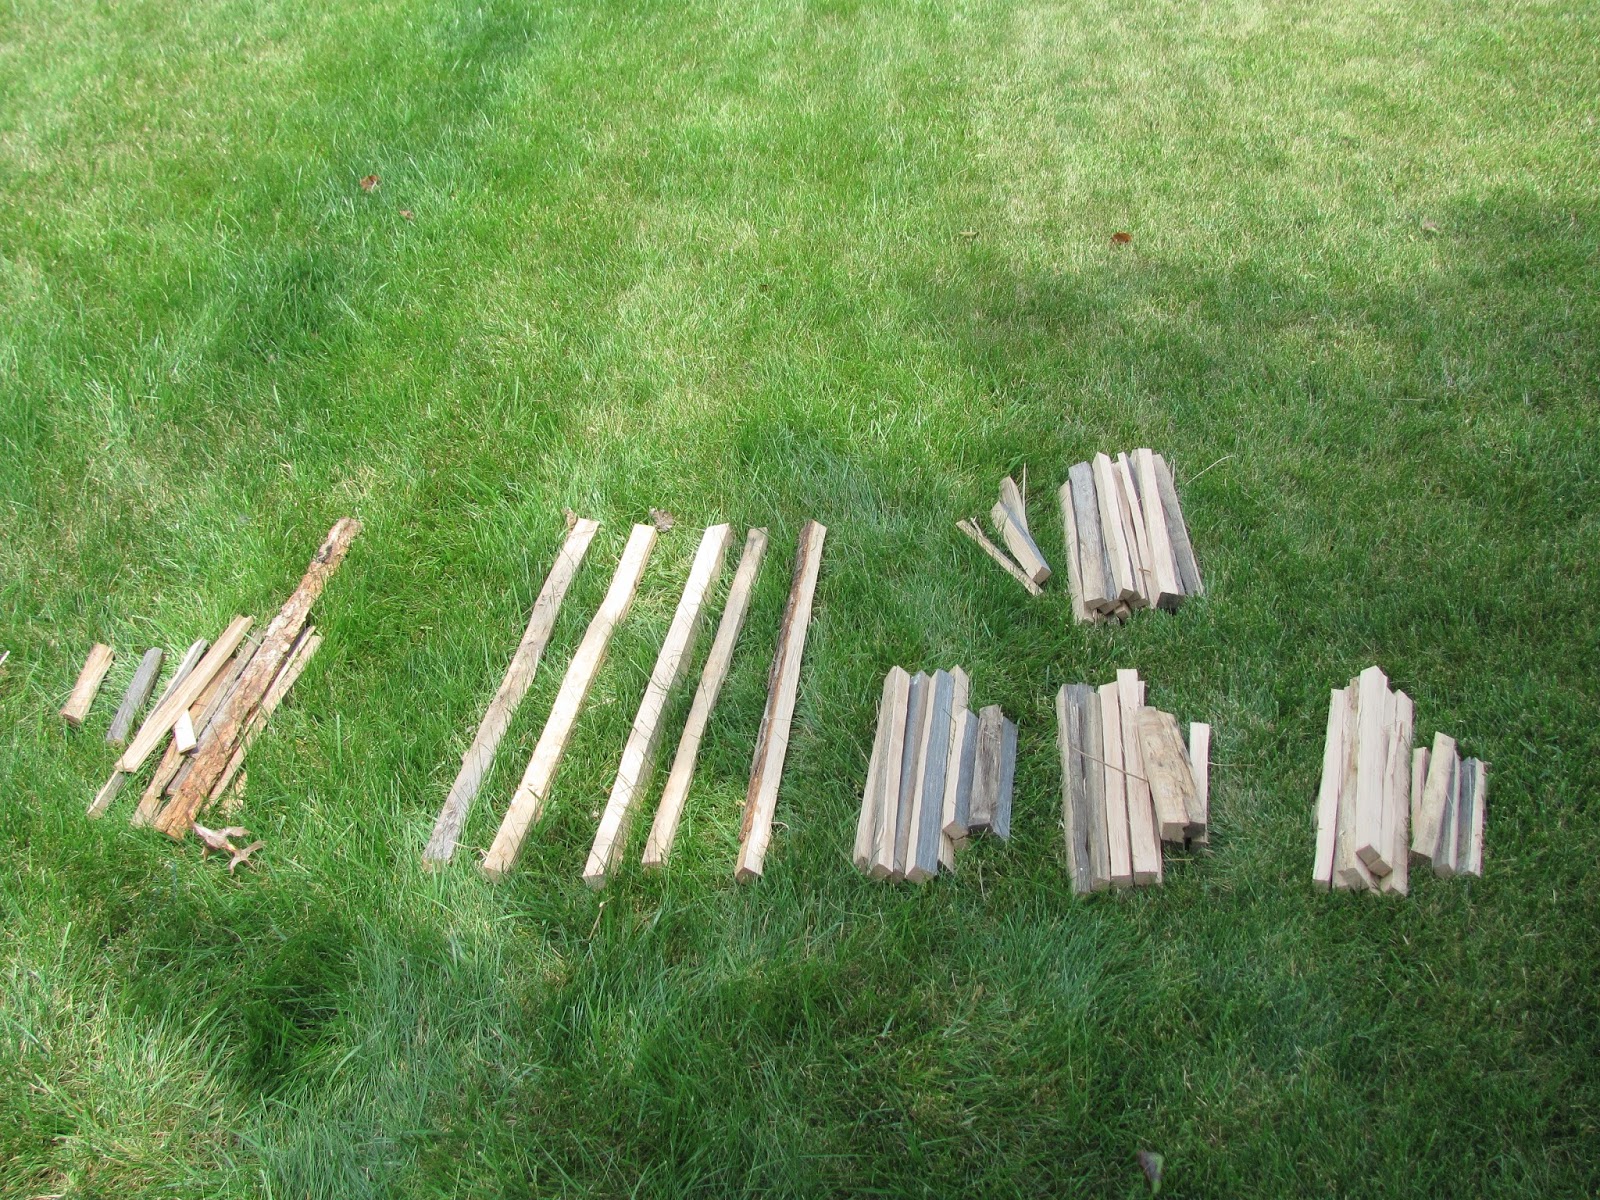
| Enough roughed out parts for uppers of three kids Sack Back Windsors plus some spare spindles. The pile on the far left is the only waste from the riving process. |
 |
Two arm/bow pieces with a bit of curve in the grain.
|
Two of the arm/bow rivings had some grain that was a little curvy. I am not overly concerned with this. I will carve these pieces following the grain, which will provide me with strong pieces. Because I will have followed the long wood fibers the piece may not be straight, but it will provide me with the best chance for a successful bend.
Since the moisture reading was 18% I decided I was going to soak these pieces in water for a few days before working with them. I want to give myself the best chance at making successful bends. I also want to see, if after rehydrating, the spindle pieces are any easier to carve than they would be at 18%
EMC. After 3-4 days I will remove one of the largest and smallest pieces and take more readings. If I am able to get a spindle to 25% I will carve it and see how the piece responds. I am hopeful to get the arm/bow pieces to at least 50%. I don't know this is all an experiment on my part. I will be posting my not so scientific findings when I find them.
 |
| Pieces ready to be rehydrated in a freshly cleaned trash container. |
I followed Pete Galbert's advice and sealed the ends of every piece with
Anchor Seal. After allowing them to dry for a few hours I placed all of the pieces into the trash container and filled it with water. As luck would have it I discovered a few holes in my rehydration device. I have since sealed them with silicone and am waiting on it to dry while I make this post.
One problem, which I'm sure you have already figured out, is wood is buoyant and will not stay submerged unless it is weighted down. I did think of this however, I figured I would "stir" the pieces every day, hopefully entrapping the floaters under the already submerged pieces, causing them to become floaters. I did put a clamp on the hinged lid so as to keep a family member from blindly tossing a bag of garbage into my floating punji sticks resulting in something very nasty.
~ Ray Schwanenberger


No comments:
Post a Comment