Showing posts with label Method of Work. Show all posts

Sunday, August 30, 2015

Whew, Just In Time!

I am happy to report that I have finished my chair just before the end of the month.  It has been quite difficult to find the time to bring the chair to fruition.  Since February, I have had my hands full rehabbing my daughter's 1920's Craftsman Bungalow.  To be honest, when I would arrive home at the end of the day there was not much left in the energy department.

Allow me to apologize for this will be a post a bit longer than usual.  When I last posted the upper portion of the chair was yet to be finished.  I glued on hand blocks and shaped the handholds.  Then I determined where to bore for the arm stumps.  I bored the holes and then reamed the arm to fit to the arm stumps.

Hand blocks and arm were jointed then glued together.

Based on measurements from the chair I determined where the arm stump holes were to be bored.  That combined with the sightline gave the exact location.

After reaming the stump holes comes the all important task of fitting the arm to the chair.  The arm must lay just right for the remaining parts to fall into place.  First I ream one hole and place the arm on the stump and rotate the arm toward the other arm stump.  As you can see in the picture below the arm is too high so my reaming needs  to be adjusted to lower the arm.  Once I have the right side (as seen from the sitting position) reamed correctly, I repeat the process for the left arm stump hole.

Arm is in need of more reaming.
The next step is to ensure that the arm lays in a level plane as seen from the front and has the appropriate amount of slope as seen from the side.

The arm sits level as seen from the front.

The arm has a nice slope to the back.
Now that this very important  step is accomplished it was time to drill and fit spindle to the arm.  The way I do this may be a bit unorthodox but it seems to work for me.  I drill the 1/2" center spindle hole in the seat at a 16 degree angle along the sightline that splits the seat at the pommel.  I then insert a 1/2" support dowel to hold the arm in place.  Sorry I should have taken photos, I know.

Next I lay out the arm holes.  I favor the back side of the arm so that when the holes are bored they will not come out the front edge of the 3/4" thick arm.  I then bore the 7/16" holes in the arm using a combination of the spindle holes played out on the spindle deck and the sight lines that are transferred to the seat.

First I bore the short spindle holes in the arm and then using those holes as a sighting guide I drill the spindle deck.  I accomplish this by inserting a long 1/2" bit up through the arm hole and then center the bit on the corresponding hole marked on the spindle deck and drill it 1 1/8" deep.  I do this with the four short spindles and then fit each spindle.  I then mark the spindle so that it will be returned to the hole it was fitted to.

Next I remove the support dowel and bore the center spindle hole.  I reinsert the support dowel and bore the remaining holes.  I then follow the same procedure used for the short spindles on the long spindles.  With the long spindles the holes in the arm are tapered very slightly during the fitting process.  This ensures that the arm will register in a level attitude during the glue up.

After all the arm  

Arm and spindle deck after being bored.
Next is the fitting of the bow.  The point at which the bow joins the arm is a steep 41 degree angle.  It is a bit of a trick to get the appropriate angle and not blow out the bottom of the arm and or scar the first short spindle.  So to ensure this does not happen I clamp the arm to a sacrificial block onto of my bench and drill the holes.  I then use a small reamer and ream the holes to accept the bow.  I fit the bow into the arm pinning it between the center spindle and the other long spindles.  At this point I check for how the bow sits.

Before boring the arm for the bow I check it against a bevel square at 41 degrees.  If everything looks good I move forward.

Bow sitting in place after being fit into the arm.  I think I got lucky on this one, it lined up on the first try.
Next step is to bore the spindle holes in the bow.  I space the spindles to what is pleasing to the eye (about 2" to 2 /14" apart), mark them and bore them using the spindles as a guide.

After that I do a dry fit of the entire upper portion of the chair.  This gives me the opportunity to make any adjustments prior to the glue up.  Which is the next and most nerve racking step for me in the entire process.  So many glue joints and it always seems I could use another set of hands.


This is after the glue up and I have already cleaned up the arm stumps and the short spindles.
After the glue has dried overnight I cut off the excess spindle and wedge ends and pare them down with a shallow sweep gouge.  Next I level the chair and finish the bottom of the legs by cutting a chamfer around the foot.  After cutting the chamfer I slice the bottoms of the leg on a #8 plane mounted upside down in my leg vise.


Next I go over the chair and inspect for any glue that I may have missed prior to painting with milk paint.  The first coat I used a dark Royal Blue base coat.  I allowed this to dry overnight.  In the morning I rubbed it down with a maroon Scotch-Brite pad and removed the dust.

Next I painted the chair with a thinned coat of a lighter Costal Blue.  This coat was thin enough that it allowed the darker base coat to show through, giving the chair a mottled look.  After allowing the second coat to dry for four hours I rubbed the chair down with a gray (less abrasive) Scotch-Brite pad.  I removed the dust and then applied one coat of a wipe on varnish.

I usually use a top coat like Danish oil on my full sized human chairs, but for a kids chair I have found it is better served with a varnish top coat.  I was happy with the single coat of varnish so I have declared my June chair build completed.  I will claim success when I see the smile of its new owner.


Hopefully you can see the mottled blue look on the arm stump.

Here it is!  A child's Sack Back Windsor, with bamboo turnings.

Many thanks to Brian Eve for starting the June Chair Build.  I am so glad that he picked the month of June since it is the longest month of the year...............


~ Ray Schwanenberger

Wednesday, June 24, 2015

Chair Build Days, Oh Heck I've Lost Track

I have lost track of what day I'm on or what day it is.  I am happy to report I have replaced my computer and I am back online.  I chucked the PC for an iMac and have a bit of learning to do.

Medial stretcher fit to side stretcher
Since my last post I drilled and assembled the under carriage of the chair.  In the past I have done my boring with a bit brace and either an auger or spoon bit.  For this chair I used a battery operated drill with a brad point bit that I ground specifically for the purpose of building chairs.  Pete Galbert covers grinding bits in great detail in his book Chairmaker's Notebook.

Drilling the leg for the side stretcher.  I removed the drill for clarity.
In the photo above I am using a method I have been using for awhile now.  I first read about this on Pete's blog and decided to give it a go.  I found it to be very accurate and much easier than my old way of measuring.  I will probably not do justice with my brief explanation but here it goes.

After the legs are reamed and placed in the seat I put painters tape on the legs running with the centerline from bottom to top ensuring I cover the area where the side stretchers will be placed into the legs.  I place the piece of plywood with a predetermined angle (I believe this one is 72 or 74 degrees) against the two right legs.  Using a carpenters pencil laid flat on the plywood angle I draw a new centerline on the tape.  Repeat the process for the left legs.

Next I place a leg in the V-Blocks and adjust the blocks so the new centerline is parallel to the bench top.  I set the board upright resting on the angle cut on the board as seen in the photo above, and use it as a drilling guide.  It is very important to remember to put the top of the leg toward you and then drill.  This will ensure you are drilling the mortise in the correct plane.

The advantage of drilling using this method alleviates having to measure each mortise angle for each leg and allows you to drill one angle that is easily repeated.  It is possible because a new average centerline was drawn onto the leg and used as the basis for drilling.  If that is as clear as mud I understand.  It took me a few times reading it on Pete's blog before it sunk in.

The H-Stretchers are assembled and the legs set back in their mortises preparing for the glue-up.
Next comes the glue up.  I assemble the stretchers in their H-pattern ensuring that the ends marked for the back legs are on the same side.  I use the bench to rotate the side stretchers so that the ends going into either the front or rear legs both touch the bench top.  This ensures that the stretcher assembly is square and will easily fit into the leg mortises.

I number each leg and the corresponding mortise.  When I glue the legs to the stretchers I start with #1 and continue to #4.  When all four legs are glued onto the stretcher assembly the tops of the legs will not fit into their mortises.  They will sit on the underside of the seat just to the inside of the reamed mortises.  This is due to the rake and splay of the legs.  Next I applied glue to the leg mortises and tenons, and with a little pressure the legs will flex enough to enter the mortises.  Then with great care seat the legs into the mortises up to the depth lines that were established when fitting the legs.

Prior to gluing the legs onto the stretcher assembly I used a saw to cut a kerf for the wedges into the top of the legs.  These kerfs are approximately 2/3 the distance from the leg top to the depth line.


Legs before wedges are inserted.
In the photo above you may have noticed that the kerfs for the wedges are cut perpendicular to the grain of the seat.  If they were cut parallel to the grain it would be very easy to split the seat when inserting the wedges.  I cut my wedges slightly wider than the mortise in the seat.  I do this so that when I drive the wedges into the kerf the little bit that comes into contact with the softer pine seat acts like a key and helps keep the legs from rotating.  Wether it is needed or not is debatable but it gives me a warm fuzzy feeling so I do it.  Another important note is to put glue on only one side of the wedge.  This will keep things from splitting when there is seasonal movement of the wood.

I use hide glue and only hide glue.  I have used Titebond or even Elmer's glue in the past, but the problem is that tight parts will seize quickly and sometimes before all parts are where they are supposed to be, and that will make one loose their mind.  I use an inexpensive hot pot with a plastic container (cut down Solo cup) to heat my glue to the optimal temperature of somewhere between 110 - 130 degrees.  I don't mix my own glue, I really like and use Old Brown Glue.

My $20 glue pot works like a champ.

When driving the wedges into the leg top it is important that the leg is positioned vertical so that the hammer blows to the wedge travel directly through the leg into the bench top.  If the chair was allowed to remain on all four legs while driving the wedges the indirect pressure of the hammer blows could cause the leg to split out below the underside of the seat.  Ask me how I know this.  I allow the freshly glued up undercarriage to dry for at least 24 hours, so the glue will reach its full strength, before cutting the wedges and trimming the legs flush to the seat.

Wedges in place.
Seat with its undercarriage.
This evening I had a few minutes so I pulled some oak,  that has been soaking for quite a bit, from its watery domain.  When I lifted the lid, well lets say WOW!  Its a good thing this blog isn't equipped with smell.

Wet spindle stock.
I carved out the 4 short spindles into octagons and set them aside to dry.  Rehydrating the oak has made it much easier to carve and to follow the long wood fibers, than it would have been if it were worked in an air-dried state.

Short spindles in their octagon shape.
Next I will finish the long spindles and then it is a matter of letting things dry for a bit before I place them in the kiln (read shop attic) to super dry.  While this was to be a June Chair Build it looks like this is going to be more like a June and July Chair Build for me.

Our host for this event, Brian Eve, has gotten his chair underway and it looks like it is going to be a nice one.  Go check it out here.

~ Ray Schwanenberger

Friday, June 12, 2015

Chair Build Days 4 and 5

Much has taken place in the shop since the last post two days ago.  Yesterday, I pulled another piece from the water and was quite pleased to see a 39% MC reading.  This meant it was time to steam and bend.

After soaking for about two and a half days.

First I had to do a little adaptation to my steam delivery system.  Up until yesterday I had used the 12' hose connecting to special fittings on both the steamer and steam box.  The problem is 12' of hose is 9' too much.  In the past I was unable to get my steambox up to 212 degrees, and I believe it was because of a heat loss in the hose.

Wallpaper steamer requires the fitting on the hose.


Hose fitting to connect the hose to the wallpaper steamer.
 After lopping of 9' of hose I was left with 3' of useable hose with a fitting on one end and open hose on the other.  What I discovered was a 3/8" ID hose inside of the black exterior hose.

Black hose acts as an insulator around the white hose that carries the steam.

 Next I removed the brass fitting from the steam box and on the drill press bore a 7/8" hole that provided a tight fit for the black exterior hose.

Brass fitting was required when using the hose as it came from the manufacturer.
While the steamer was bringing the temperature up in the box, I carved a piece into a 7/8" round bow. I marked the center with a line and an arrow so that I would know what side to put up.  It is best to figure this out before you have a very hot piece of wood in your hands that needs bent in 45 seconds. I mark the wood in such a way that the tangential plane is against the form.  The tangential plane is parallel to the bark and the radial plane runs from the pith to the bark.  This would mean the growth rings would be parallel to the bending form.  I am happy to report that my steam box made it to 212 degrees with ease.

The steam box actually held 212 degrees without a problem
  
The bow was in the box and the timer set for 1 hour.  When working with green wood I will usually steam pieces for 30 minutes.  Since I was working with wood that had been air-dried I rehydrated the pieces and doubled the steaming time, as suggested by Pete in his book Chairmaker's Notebook. While the steaming was taking place I prepared for the bending.  As I said before, once the piece comes out of the box you have a short bit of time to wedge the piece at its center point (arrow up facing the form), bend, pin and wedge the the ends before it cools too much.  When the hour was up I put the bow in the form and bent away.  I was so so happy with the results. It bent like I had just taken the piece out of a freshly cut tree.

The only place where a fiber or two raised , SUCCESS!
 
I attribute the success of the bend to being able to rehydrate the material and being able to deliver a consistent flow of 212 degree steam through out the steam box while using a defect free piece of oak. I was so psyched with the results I carved two more bows and put them into the steam box for an hour.  Well it would be great if I reported only my successes, but that isn't me.

The other two bows came from pieces whose grain was not as straight as it should be (understatement of the week) and as a result I ended up with a few small delaminations.  I was able to use some polyurethane glue and tape to repair those.  This morning I steamed and bent two arms that I carved and they were out of some wood that I most likely should have cut short of the wonky grain and used for spindles.  However I had to give it a go (I need help). One of the arms suffered major delaminations and required glue, clamps and then tape.  At this point this arm has become an experiment.  The other arm fared a bit better but I will most likely burn it also.  It is said that a picture is worth a thousand words, well here you go.

Delamination in the bow caused a kink most likely rendering it unusable.  There is some extra material on the bow, therefore if I am able to fare the curve without loosing to much material it will be used.

This is the repaired delamination that caused the kink.

This arm bent the best but the wonky grained prevented me from being able to keep it flat in the form.  As part of my experimentation I have clamped it to my bench top with holdfasts to see if it will set in a flatter profile.

Moral of the post: If you find yourself wanting to bend pieces like these DON'T!  Seek help!
Five bends with one for sure usable bow and four ahhh maybe's.  I guess we will see how or if I am able to recover.
When the day ends it is time for the clean up crew.  My grandson Zane telling me "I help Pappy".

I have an arm that I had bent earlier so I am good to go there.  I usually bend more than one component just in case, and it appears it was a good thing.  Next I will be carving the spindles and then setting them aside to dry with the bendings from this past session.  Until the next time may you be blessed with straight grain always.

~ Ray Schwanenberger

Wednesday, June 10, 2015

Chair Build Day 3

I woke up this morning and my foot was feeling good so, after my morning cup of coffee I headed to the shop.  I opened my Quercus alba rehydration device (white oak soaking in water in a trash can) and pulled a thick piece of spindle stock from the odiferous brackish water.  I checked the moisture level with my meter and I am happy to report it measured 29%.  Since the reading increased by 11% in just one day and I had turnings to do and finish carving the seat, I decided to let the rivings continue to soak.

After one day soaking an increase in MC of 11%

I moved onto finishing the carving of the seat.  The seat on a Sack Back is called and oval seat and the grain runs from side to side.  On a kids chair I carve the bowl to approximately 3/4" deep.  I like to have the area where the legs cross over the front of the seat about 1/2" lower than the spindle deck. This makes for a very comfortable chair that does not cut off the circulation to the legs.

I did not remove the extra wood on the back of the seat so I had plenty of material to clamp in my bench's leg vise in order to work on the front and sides of the seat.  I used my bevel up draw knife to make the relief cut to the front of the seat that gives it its distinctive profile.  I then used a drawknife and spoke shave to fair the curve on the sides of the seat.

Front of the seat.

Next I removed the excess material from the back of the seat blank.  I then took great care in clamping the seat in my vise and finished fairing the curve around the back of the seat.  My leg vise chop and the portion of the bench face covered by the chop are lined with leather.  This is to aid in gripping and helps to keep from damaging the material being held in the vise.  A note of great importance; When clamping in a bench vise, a seat blank that has been cut to size and carved, ALWAYS clamp on the spindle deck.  NEVER clamp onto ANY PART of the carved seat.  Don't ask me how I know this will save you grab mental anguish.

Next I removed the material where the legs cross over the front of the seat.  To do this I used the drawknife, scorp, travisher and spokeshave, taking light and deliberate cuts.  It was ultra critical to pay close attention to the grain.  With so many undulations in this area it was very important to ensure I was cutting downhill with a skewed blade.  A slip or misguided cut at this stage could result in a tear out that may not be able to be repaired.

I then finished up with several shaped scrapers and sand paper.  On some of my first seats I didn't use sandpaper.  Curtis Buchanan explained that the seat was the largest surface on the chair and naturally draws ones eye to it.  For this reason, Curtis scrapes and sands to ensure the finish is at a very high level.  At this point I close my eyes and run my fingers over the seat surface.  I have learned that my eyes do not see the surface as well as my fingers can feel it.  The slightest bump or dip is easier to find and fix.

Circled areas are slightly higher than the surrounding surface.  I could not see them but I could feel them. 

After sanding the seat bowl down to 120 grit I planed the spindle deck with my No. 4 hand plane, re-carved the gutter and set the seat aside.  Next I turned the four legs, two side stretchers and the medial stretcher.  I am using bamboo turnings for this chair.  The double bobbin turning is sometimes misidentified as the bamboo turning.

Finished Seat


Bamboo leg turnings

Four different type turnings from left to right:
Baluster; Blunt Arrow or Ball & Cylinder; Bamboo; Double Bobbin w/A Bead

Tomorrow I will check on the soaking oak and begin to put the undercarriage together and attach it to the seat.

~ Ray Schwanenberger

Monday, June 8, 2015

Chair Build Day 2

The big white oak, as you can see it has begun to split by itself.
Above is the oak log that has been residing by my garage for what I have determined is almost two years.  I recruited my future son-in-law to split the white oak into a few manageable pieces for me. When I went out to make it accessible, and take the picture, I was happy to uncover previously split and rived pieces.  You can see them between the log and the wall.

Previously split and rived pieces I uncovered.
While I was unsure what the moisture content of the log would be I was certain that the previously split pieces would be too dry to work with.  I used my froe and rived the largest piece in two and then took a moisture reading from the freshly opened face. As I had suspected the wood was fairly dry, the meter read 18%.

Shavehorse doing double duty as a saw bench.
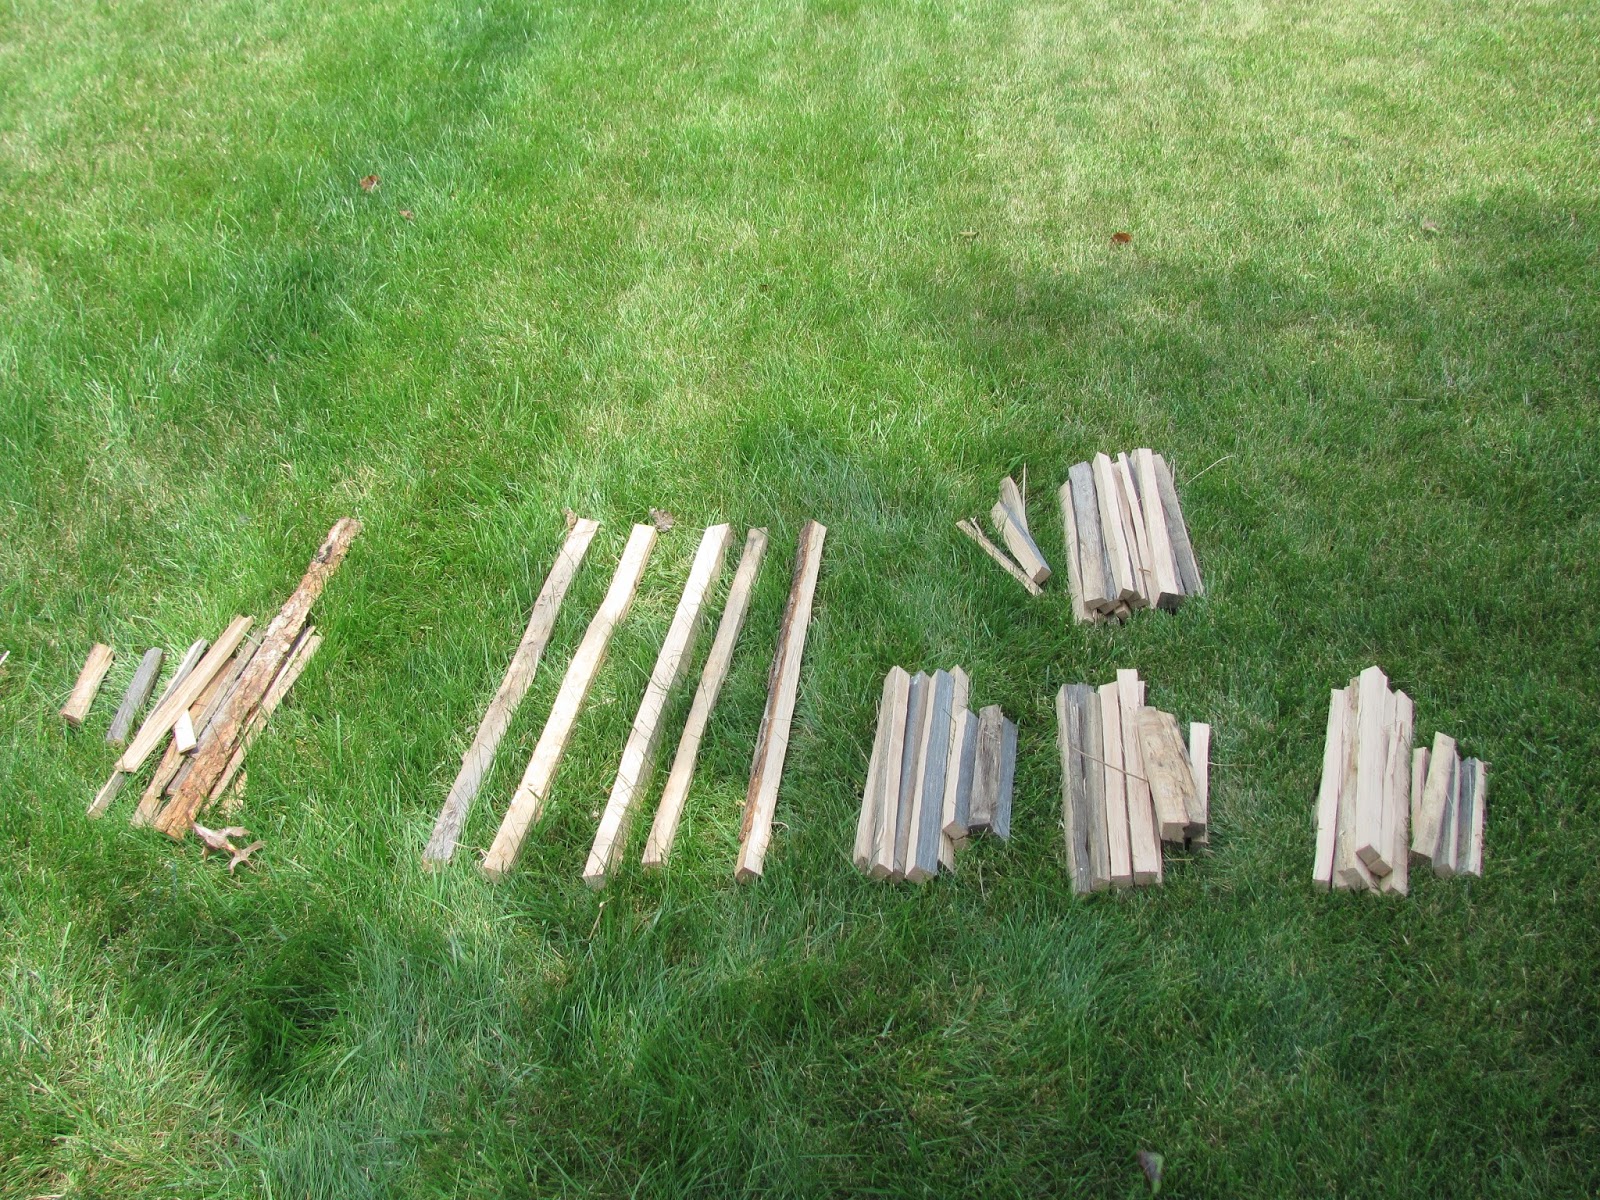
I cut the pieces for the arm/bow and spindles to their rough length and then using my froe and riving brake rived the pieces to rough size.  Click here to see a video of Curtis Buchanan demonstrating how a froe and riving brake are used.

Enough roughed out parts for uppers of three kids Sack Back Windsors plus some spare spindles.  The pile on the far left is the only waste from the riving process.  

Two arm/bow pieces with a bit of curve in the grain.
Two of the arm/bow rivings had some grain that was a little curvy.  I am not overly concerned with this.  I will carve these pieces following the grain, which will provide me with strong pieces.   Because I will have followed the long wood fibers the piece may not be straight, but it will provide me with the best chance for a successful bend.

Since the moisture reading was 18% I decided I was going to soak these pieces in water for a few days before working with them.  I want to give myself the best chance at making successful bends.  I also want to see, if after rehydrating, the spindle pieces are any easier to carve than they would be at 18% EMC.  After 3-4 days I will remove one of the largest and smallest pieces and take more readings.  If I am able to get a spindle to 25% I will carve it and see how the piece responds.  I am hopeful to get the arm/bow pieces to at least 50%.  I don't know this is all an experiment on my part. I will be posting my not so scientific findings when I find them.


Pieces ready to be rehydrated in a freshly cleaned trash container.

I followed Pete Galbert's advice and sealed the ends of every piece with Anchor Seal.  After allowing them to dry for a few hours I placed all of the pieces into the trash container and filled it with water. As luck would have it I discovered a few holes in my rehydration device.  I have since sealed them with silicone and am waiting on it to dry while I make this post.

One problem, which I'm sure you have already figured out, is wood is buoyant and will not stay submerged unless it is weighted down.  I did think of this however, I figured I would "stir" the pieces every day, hopefully entrapping the floaters under the already submerged pieces, causing them to become floaters.  I did put a clamp on the hinged lid so as to keep a family member from blindly tossing a bag of garbage into my floating punji sticks resulting in something very nasty.


~ Ray Schwanenberger

Friday, June 5, 2015

Chair Build Day 1

Well as you might imagine getting around in the shop with a large medical boot brace on ones foot is cumbersome.  However, I must press on.  Usually I would split, rive and shave my arm and bow parts first. Followed by a good steaming then bending them in their appropriate forms and setting them aside to dry.  Then I would move onto the other greenwood work, the spindles.  But as I said in a previous post I am going to be doing things a bit out of order, due to my aforementioned state of gimpiness.  I am attempting to recruit a strong young person to split that big ole oak log for me.  So far no luck.

So I started on the seat blank.  I laid it out, drilled my center spindle hole and the four leg holes.  I then began to carve the bowl of the seat.  I am happy to report that the Sugar Pine carves very nicely. Like its cousin Eastern White Pine it requires sharp tools.  I started with my adze made by Tim Manney.  It works so nicely and made very short work of removing the bulk of the seat bowl.  I am a novice with this type of adze and am still learning the nuances of the tool.  Next I moved onto the scorp/inshave. Taking a skewed cut working downhill while paying close attention to the grain is paramount.  The wood will let you know how it wants to be carved.  It is very important to heed its warnings so as to avoid tearing out a deep hole that will be difficult to remove.  The last step was to move to my travisher made by Claire Minihan.  The travisher is a bit of a peculiar tool to learn to use, for me at least it felt a bit counter intuitive.  Again I used a skewed cut working downhill paying attention to what the wood would allow me to do.  Using my bandsaw I cut out the front of the seat in preparation to carve it.

Tools Left to Right: Adze, Travisher, Scorp/Inshave

Next I drilled the arm post holes.  To do this I used a square, bevel square and mirror to obtain my 17 degree angle along the sight line.  The mirror allows me to compare my drill bit to the bevel square with a glance rather than having to move my head around causing me to loose alignment with the sight line. I use a square lined up perpendicular to the sightline to help me stay aligned as close as possible to the sightline.


After drilling both arm post holes I turned the bamboo style arm posts on the lathe.  I do this before reaming because I want to assign and fit an arm post to a particular mortise during the reaming process.  The arm post will be marked for its particular mortise and that is where it will reside for the remainder of its days.

Bamboo Style Arm Post
   
Next I ream the arm post holes and make them into tapered mortises.  As when drilling, I use a square, bevel square and mirror when reaming.  My reamer has a 6 degree included angle, therefore I set the angle to 14 degrees, three degrees less than the 17 degrees used to drill the holes.  I align the blade of the square with the sightline and compare the top tip of the reamer with the blade of the square.  If it lines up with the edge of the blade, I'm spot on.  If the tip is left I must take more off the right side of the mortise and vise versa if the tip is right.

Reamer is in line with the sightline
 
Next I brought the bevel square up to the reamer and observed the gap between the blade of the bevel square and the tapered surface of the reamer.  If the gap is the same up and down the reamer, I'm spot on.  If the gap is larger at the top I need to take more off the mortise toward the square and vise versa if the gap is larger at the bottom.

Reamer is at the correct angle

So after reaming both mortises to the indicated correct angles one might think that it is a completed task.  Oh contraire!  What I have neglected to explain is that I actually don't ream the mortises to their final depth until after I check to see that both arm posts are in the same plane.  I feel this is one of the most critical stages of building an armchair.  If the arm posts are not in the same plane it will make it hard to get the arm to sit correctly at a later stage in the process.

Winding Sticks to check the plane of the arm posts

Even though everything appeared to be correct, a pair of winding sticks would let me know just how close or far off  I was.  At first check I was off a wee bit and it was close enough that a very minor adjustment, a half turn of the reamer to the left arm post mortise, was all it took to be nuts on.

The gap at the left is ever so slightly larger than at the right.  When the gap is even everything is copasetic.
Well that was all my foot could handle for the day.  Next I will be turning the legs and stretchers for the undercarriage.  All the while I will be attempting to recruit some help with getting that oak split.  

~ Ray Schwanenberger